
Event Blog
Marketplace Events creates vibrant expositions connecting enthusiasts with experts, products and services. We produce consumer home shows and holiday shopping shows, for details and to purchase tickets to a show in your area, visit our show calendar.
We enjoy sharing our love of all things home and garden! Everyone is welcome to gather tips--then see it all in person by attending one of our shows for even more of the latest trends in home and garden. While at our shows, you can meet and learn from celebrity designers, shop, compare and save with our trusted exhibitors. Building up to the holiday season, we also share seasonal tips on decorating, entertaining, and other festive fun!
How to Hack Your Smart Garden
(The overpriced bucket with a light on it you bought early in the pandemic.)
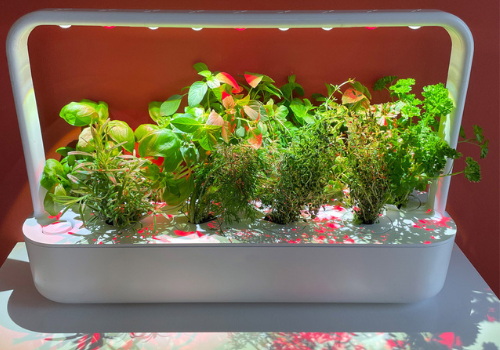
After using packaged ‘pods’ to grow our smart garden, we quickly noticed the time it takes to grow an edible sized plant was so long, that when it finally happened, everything was already beginning to turn brown. The amount of nourishment in a pod seemed insufficient to start from a seed and get to a point large enough to harvest. There was certainly never enough for multiple harvests. Don’t even get us started on the size of the strawberries.
There is a way to have a full garden that lasts 3-4 months and is ready to use from day one! Consider this our garden hack gift to you. Find a hydroponic herb garden at a local supermarket, or when you are shopping for fresh herbs look for any that are still attached to their roots. Select the number of herbs you’ll need to fill your smart garden, for ours we require nine. These herbs were each around $2.50, making this garden project approximately $22. Bonus, your completed indoor herb garden also works as a living air freshener!
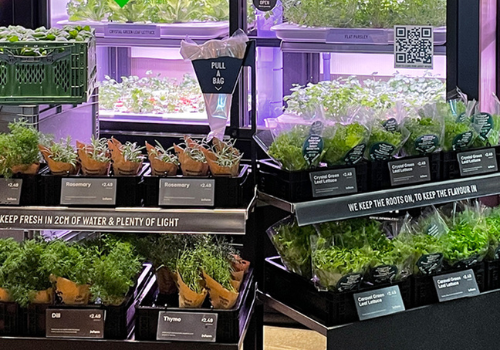
Supplies:
- Fresh herbs with roots attached
- Potting mix for indoor growing of vegetables & herbs (Miracle-Gro or Golfgreen)
- Bowl and spoon
- Scissors
- Masking tape & Sharpie marker
- Kitchen towel
Garden Project Steps:
Step 1:
Clean out your smart garden and rinse everything with hot water. Wipe down with paper towel. Avoid dish soap – plants do not like soap.
Step 2:
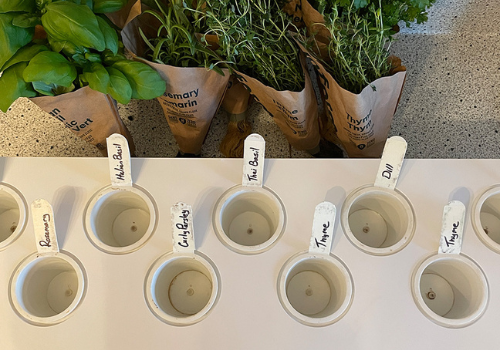
Dry everything off and create labels for your herbs.
Step 3:
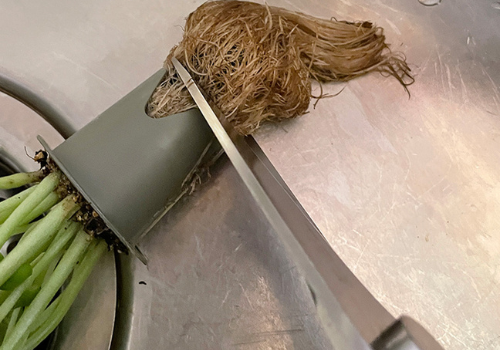
Cut the herb root down enough to fit in the pot. Remove the plastic ring from the herb plant.
Step 4:
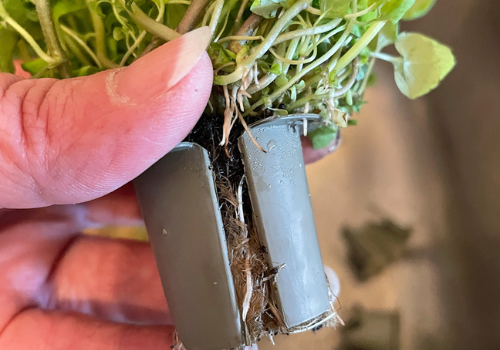
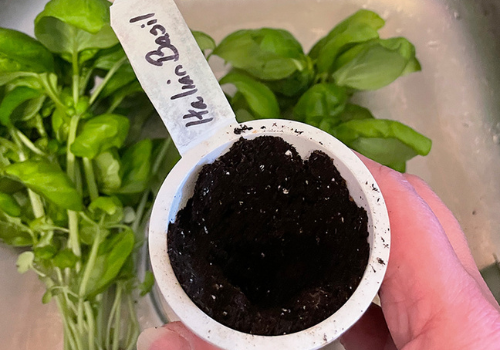
Pack as much soil as possible in the pot. Make a well in the middle to fit the root ball. Pack additional soil around the edges and continue to press down until everything is compacted. Replace the white plastic cover on the pot.
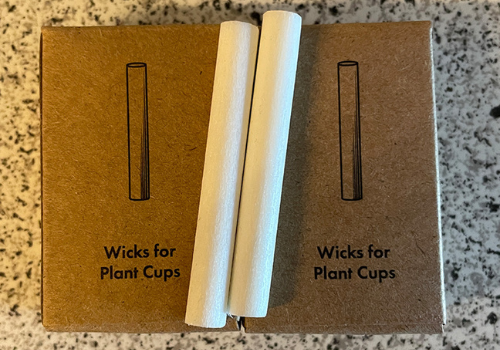
Smart Garden Hack: After a few re-plantings, replace the wicks in each pot. Extra wicks are available from the manufacturer website. This will ensure your plants are always getting enough water.
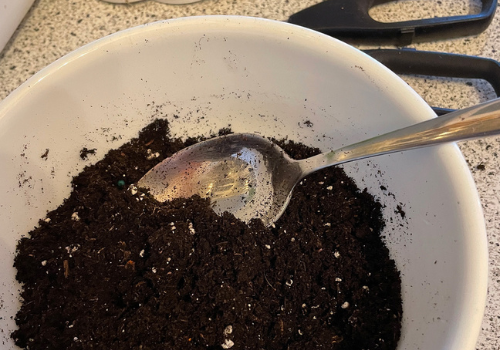
Garden Tip: Use a bowl and soup spoon to plant your pots. It’s much easier to use a small amount and helps with the mess as everything is quite small.
Garden Tip 2: Place all planted herbs loosely into each hole in the smart garden. This allows you to arrange them all once they are all planted before securing them in to place.
Once you have arranged all your herbs so they look nice and will each get a good amount of light – WATER! Fill your smart garden until the float rises to the top. Voilà! You’ve successfully completed this garden hack and can tell everyone about your new garden project. You now have an indoor herb garden that will last three to four months that you can use again and again!
Whether you’re looking for help with your next major outdoor garden project or looking for smart garden hacks to try indoors, Marketplace Events produces some of the longest-running home and garden shows across North America. We can connect you to experts, products, and services, not to mention provide design inspiration – no matter your project size or budget. Check out a nearby show.


